Most of us already prepare checklists for tasks such as shopping, traveling and so on. We do that because checklists help us navigate through challenging tasks efficiently. Even NASA uses checklists during space missions; and pilots during takeoff and landing.
Similarly, a successful website launch is critical for you, and you can easily miss out important steps when you are ready to launch. To help you avoid the mistakes that we have learned from over the years, we’re giving away the exact checklist that we follow when launching a new WordPress website.
Note: You can download website launch checklist in PDF format and share it with your team members.
Let me quickly take you through our comprehensive website launch checklist and explain each of the key areas in detail along with examples wherever relevant.
1. Harden the Security
Your first priority when getting ready to launch any WordPress website is security. There is a wide selection of different tools available for WordPress that cover all aspects of website security. Plugins like Sucuri, iThemes Security and MalCare provide an extensive suite of tools to protect your hard work from unscrupulous individuals that would like to spoil your day.
2. Protect Website Against Spam
One of the most annoying aspects of having a popular website is spam. We recommend taking the time to deal with this before launching your website by installing a plugin to help combat those annoying comments.
There are many great anti-spam plugins available, but we recommend Antispam Bee as it’s 100% free and does the job well.
3. Configure an SEO Plugin
Imagine a website that is built beautifully, with all your products and services listed and a very attractive design to hold back visitors. Sounds great?
But, what if this website does not get enough visitors or is not found? Search engines like Google send thousands of visitors to the website if they are made search engine friendly.
WordPress, out of the box is very search engine friendly. However, you can still improve the SEO further with plugins like Yoast SEO.
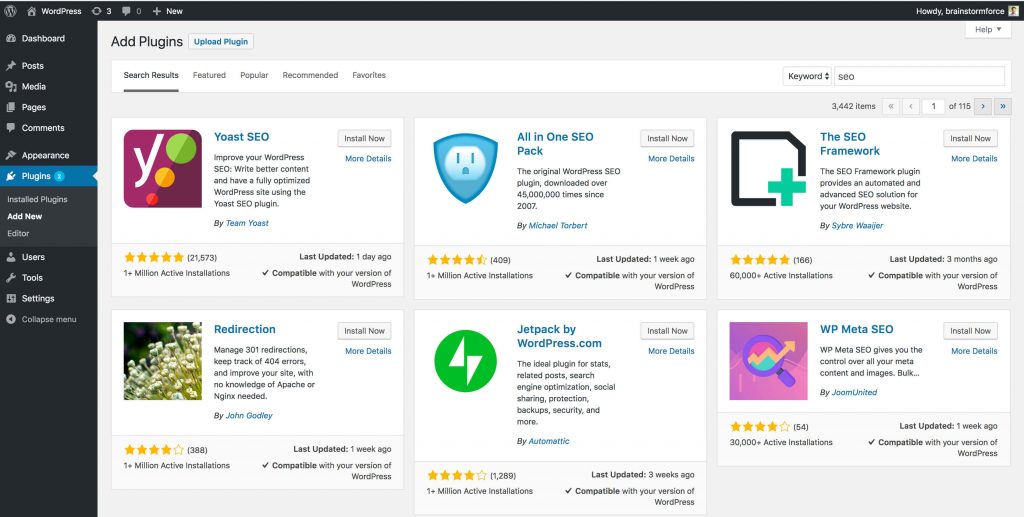
SEO plugins will quickly help you add a sitemap for the website, and a title, meta tags and descriptions for all the important pages on your website and much more!
4. Add Google Analytics Code
What good is all that time and effort spent on creating great content, tweaking and perfecting your SEO if you have no idea who, if anyone is looking at your website? To help gather all such important information you should create a Google Analytics account and add the relevant code to your website to ensure everything is being tracked.
Google Analytics allows you to not only see how many people visit your website but where they are coming from, what browsers they use, how long they stay on your website, what pages they visit and so much more.
Not only that, but you can setup simple goals that allow you to track sales funnels, eCommerce effectiveness and much more.
5. Check all Permalinks
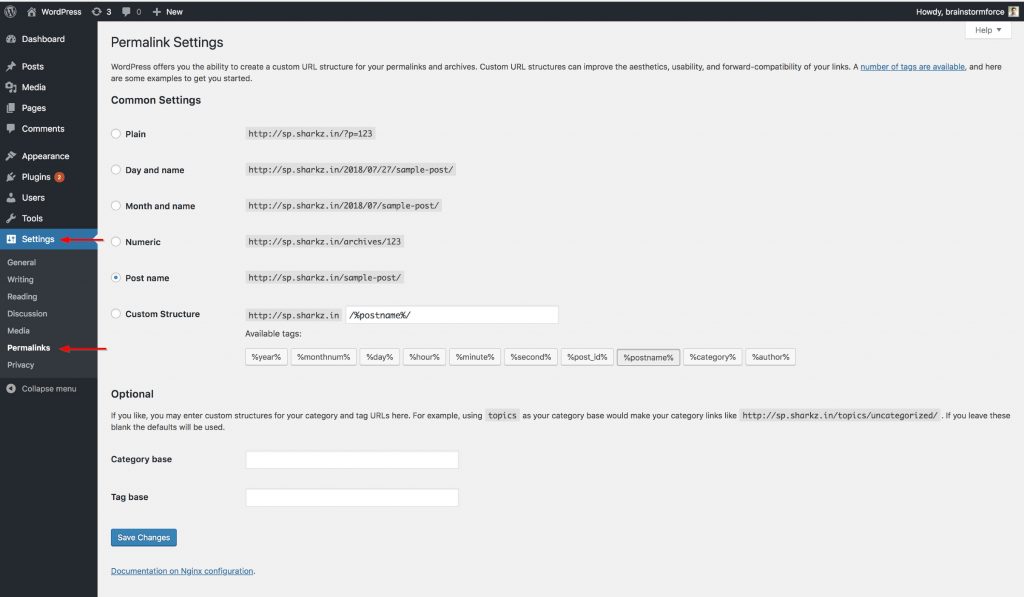
WordPress makes creating more memorable URLs to your pages easy. You can pick any of the pre-defined structures or create something more unique to you. So, it’s the key to ensure that everything is setup correctly before launching your website.
It’s incredibly easy, even if you’ve never delved into it in the past. Simply log into your WordPress Dashboard, pop over to the Settings section and choose Permalinks. Here you can set things up in a couple of seconds and then basically forget all about them.
6.Add Social Share Images
These are the images that appear in the snippets when someone shares the website on social media. Most SEO plugins help with this.
7. SSL Certificate for the Website
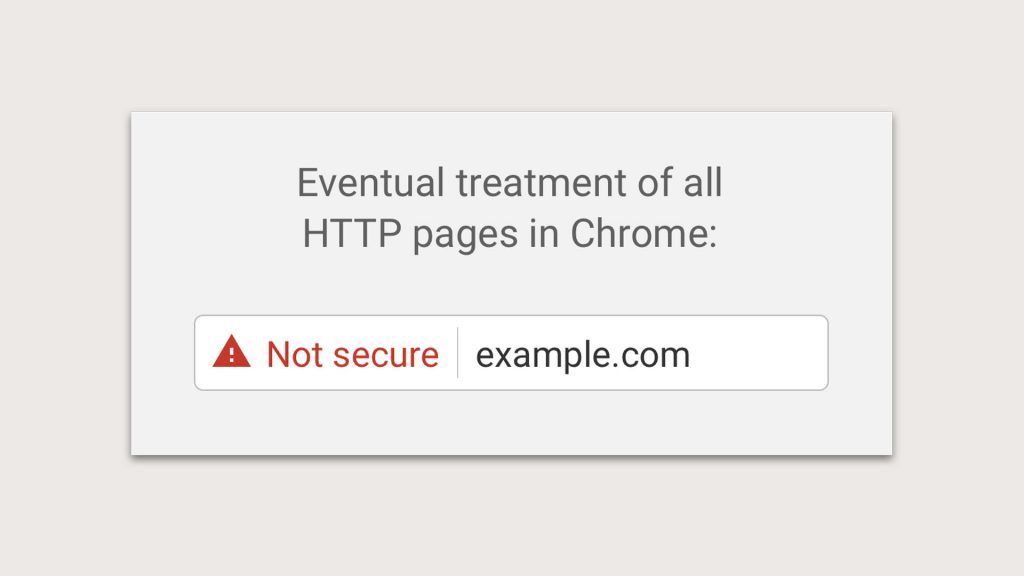
SSL or Secure Socket Layer certificates are more important than ever and if you’re not using one, Google Chrome and many other browsers are now flagging your website as insecure. This is obviously a bad thing and very easy to fix. Most hosts offer a free SSL certificate these days. If you’re not sure, please get in touch with them.
8. Check Favicon
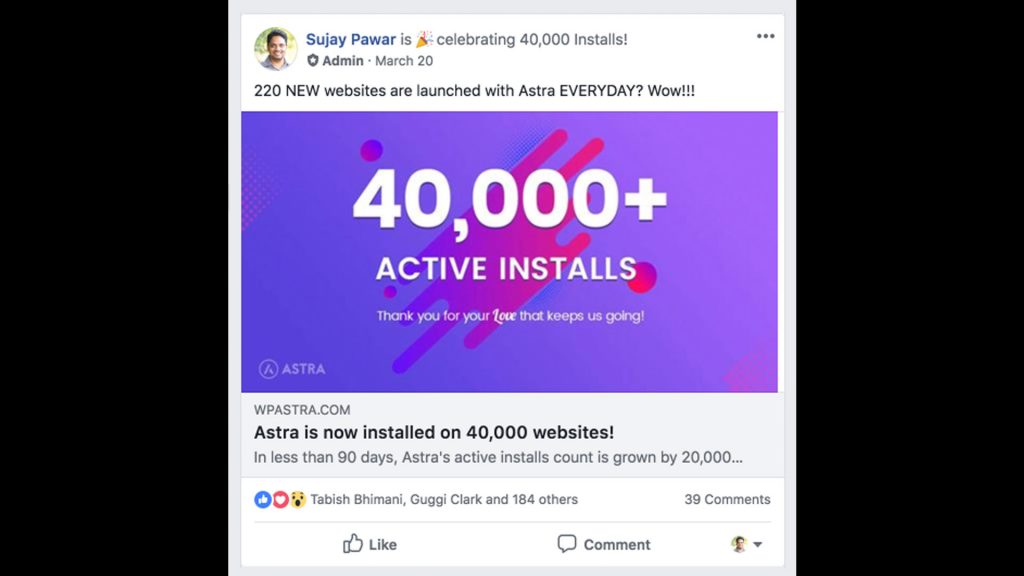
What’s a favicon? It’s that little logo or icon before your website address in the address bar of the browser and is a great opportunity to expand your branding. They are really easy to setup and most modern themes will have an option to set yours.
In our Astra theme, all you need to do is open the Customizer and go to Site Identity and Select the image you want to use for your Site Icon. A good choice is a simplified version of your logo, but you can use anything you want. Just make sure you create a square icon to get the best results.
9. Add a Retina Logo
Unless you are using the logo in SVG format, it is highly advised to upload the retina version of the logo as well. This makes it look great on high-resolution screens.
10. Allow Search Engine Indexing
Very often while a website is being built, we turn off search engine indexing. In fact, it’s a good practice to turn off search engine indexing while the website is in development mode.
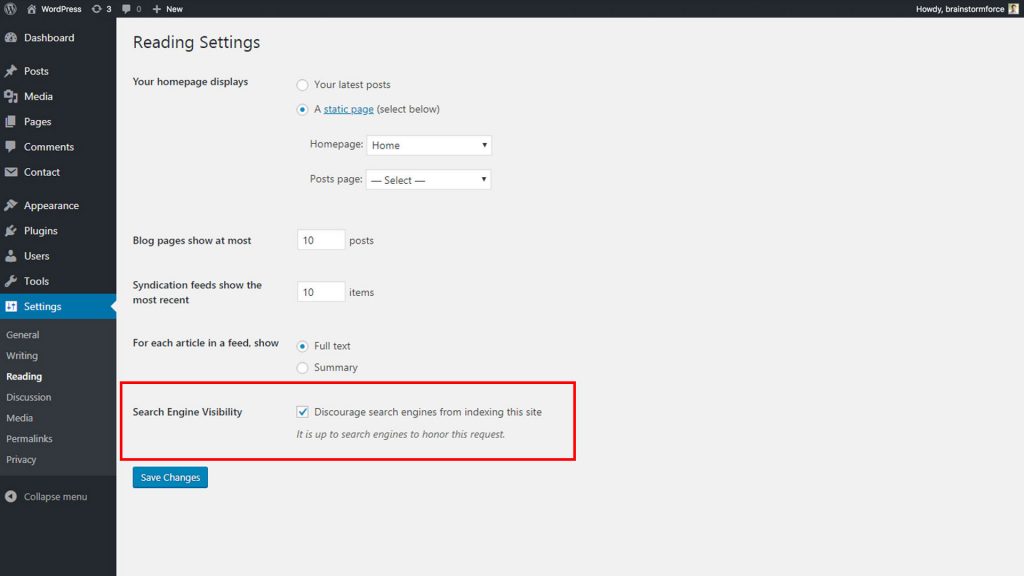
However, if you want the website to be indexed by Google and other search engines, be sure Search Engine Indexing is ON before launching the website.
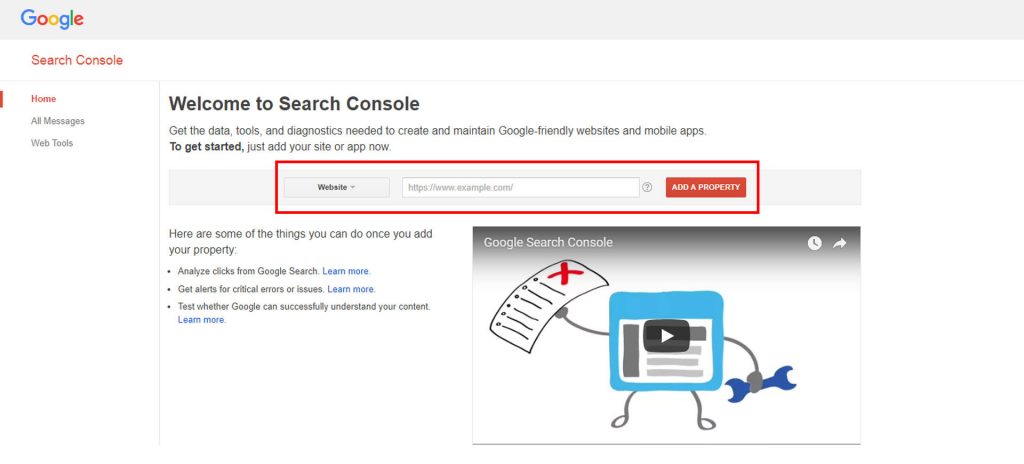
11. Submit Website to Google
When you’re ready to launch you’ll probably want the largest search engine in the world to know you’re ready for some attention. To speed the process of Google popping by, you’ll want to add your website to Google and tell it you’d like them to come by and take a look at all your hard work.
This is incredibly easy to do. Search ‘Submit URL to Google’ and you’ll get this simple input box. Add the full URL of your website, click Submit and that’s it! Give it a few days and you should be listed in Google.
12. Review Cross Browser Compatibility
Making sure your website plays nicely with as many browsers as possible is challenging, but with the help of websites like Browsershots, you can get a good idea of how your hard work will be viewed by the world.
There are many other tools like Browserling, CrossBrowserTesting and many more. Feel free to try any and use the one you feel comfortable with.
13. Test Website on Different Devices
Talking about cross-browser testing, you need to keep in mind that your website will generally be viewed on multiple devices. Again, tools like Browsershots can be incredibly useful as they generate and show screenshots of how a website looks on different browsers and devices.
Furthermore, I recommend you to test the experience personally on at least one touch device to get the feel. Since there is no “hover” on touch devices, a real test on the actual device is always helpful.
14. Check for Broken Links
In the development process, we change links and pages very often. So it’s a good idea to ensure that your website is free from these issues before you launch it to the world.
You can use a plugin like Broken Link Checker for WordPress or use one of the many free and tools like Xenu. You can also use Google Chrome extensions such as Broken Link Checker and Link Miner.
It’s also a good idea to periodically scan your website to check that all your old links work correctly and that you haven’t inadvertently removed or updated a page and not updated your link structure.
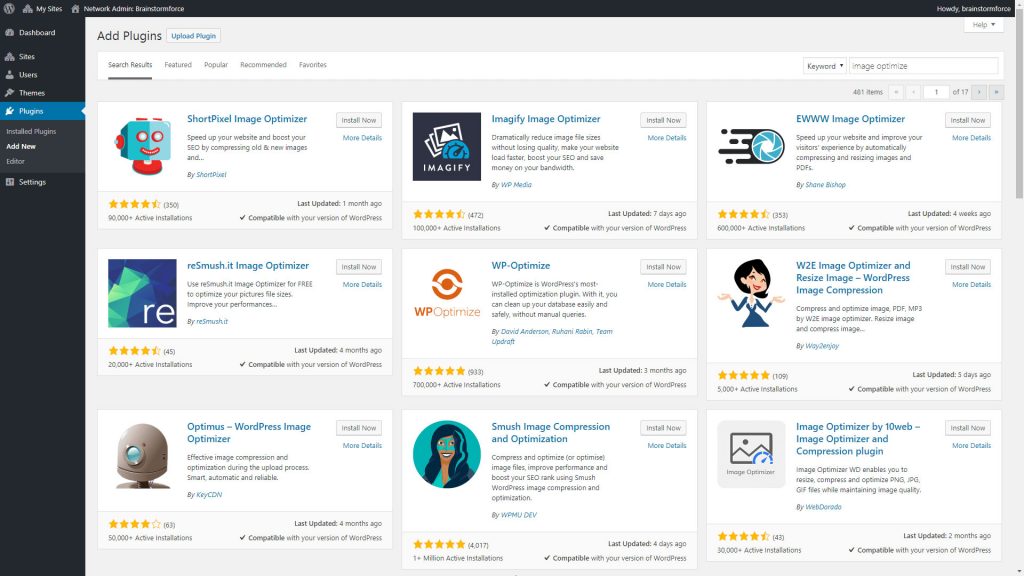
15. Optimize Images on the Website
Images make your website look beautiful but can also be the cause of slow page loading. Optimizing your images is not only a good practice but will reduce your page loading and hosting requirements.
While a software like Photoshop is great for reducing overall image size, it’s not the best tool for squeezing every last drop of file reduction from your images. Especially when you’re using png files with transparency. This is where plugins like ShortPixel, EWWW Image Optimizer can really help. Both offer free plans as well as commercial options and can really help optimize your images.
16. Check your Grammar and Spelling
While there are tools that will help with your spelling and grammar, nothing beats the human eye. Ensure you take the time to read your website copy for errors or omissions. Nothing looks worse than a badly worded page on your website, especially if you’re a business trying to sell your product or service.
Here are a few tools that will help you with this:
17. Proofread Content on all Pages
Following on from checking your Grammar and Spelling, proofreading can help ensure that your written words actually make sense. Take the time to read through and if possible, ask people you trust to cast an eye over your hard work to ensure you’re not missing obvious errors or omissions from ‘word blindness’ caused from spending too much time with your copy.
18. Update the Admin Email Address
When you first install WordPress you need to put in your Admin email address, the email that you want to use to be notified of pretty much everything that happens on the website.
Take a moment to log in to your WordPress Dashboard and make sure the email address is correct.
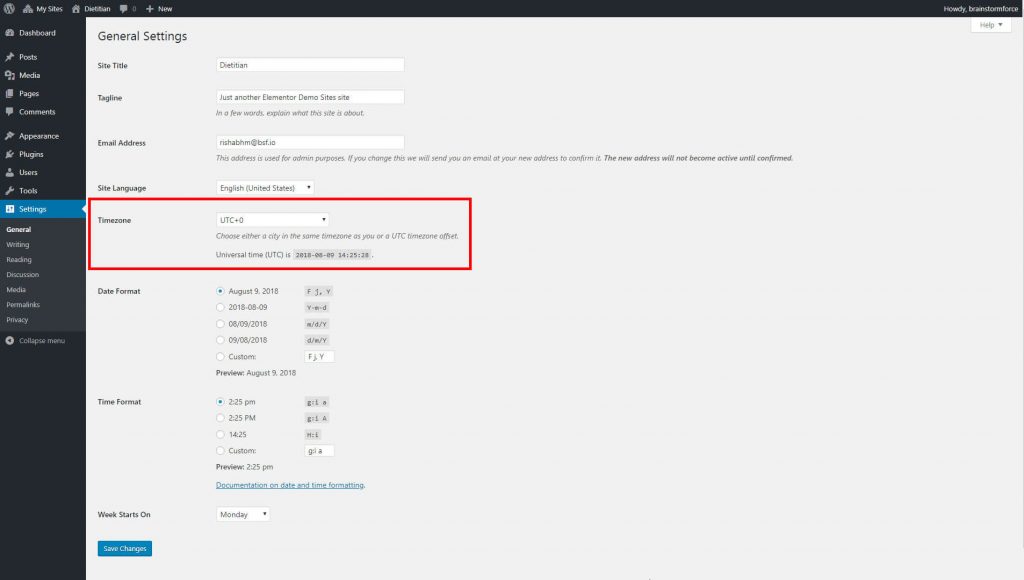
19. Check Timezone Settings
Make sure that WordPress displays an accurate date and time by visiting General Settings page in admin area. You can change date and time settings and the format there.
20. Remove Unwanted Plugins, Images, etc.
During development, you’ll probably end up testing lots of ideas, have images or plugins that were added just to test ideas or pass options past your client. Once the site is ready to go live, it’s worth taking a few moments to check and remove these redundant items to provide a streamlined launch experience; especially if you intend to hand the site off to your client.
21. Remove All Unwanted Pages/Posts
WordPress adds some sample content in the form of a Page and a Post. You may well also add in some sample content or demo pages while developing your website. Now is a great time to ensure that those pages and posts are removed prior to launch. You don’t want the Search Engines including your Lorem Ipsum filled pages in your sitemap!
22. Remove WordPress Post Revisions
WordPress’s autosave feature is a great feature to have, but your revisions (earlier versions of the page you’re working on) can soon build up and this will invariably slow down your database and website over time. It’s a good practice to remove these revisions when you’re sure that the page or post is ready to go live.
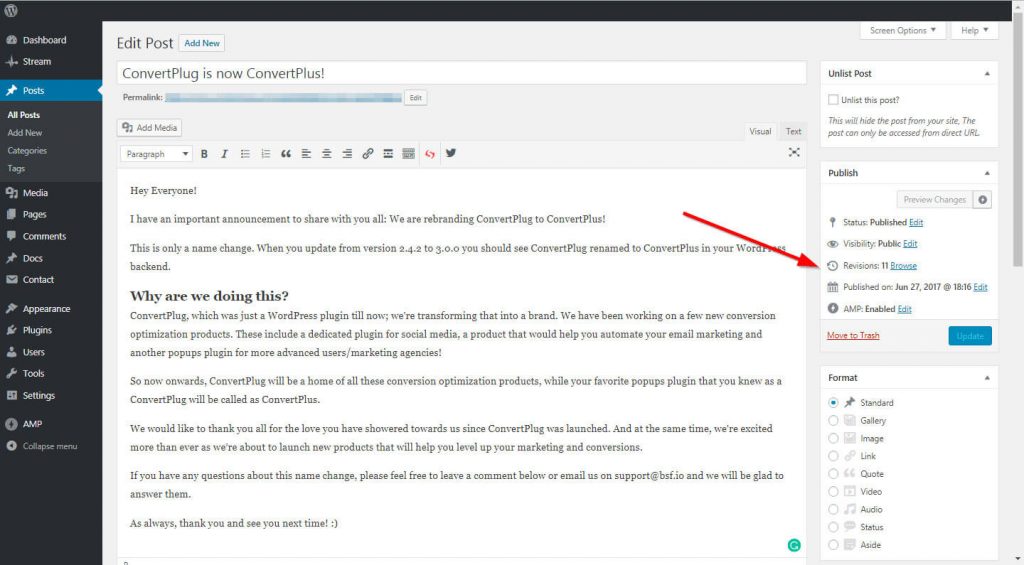
The quickest and easiest way to deal with these revisions is to use a plugin like WP Sweep to quickly remove them.
23. Check all Forms on the Website
There’s nothing more frustrating for a user than filling in a form on your website and never getting a reply! Before launching your website, take a few moments to test all the forms on your website to ensure they are configured correctly and being sent to the correct email address.
24. Check Performance
You’ve crafted a beautiful design, optimized all your images, proofread everything and you’re almost ready to launch. Now’s the time to test your website’s performance and address any issues.
You can use free online services like GT Metrix or Website Speed Tests to identify any areas that are causing your website to underperform!
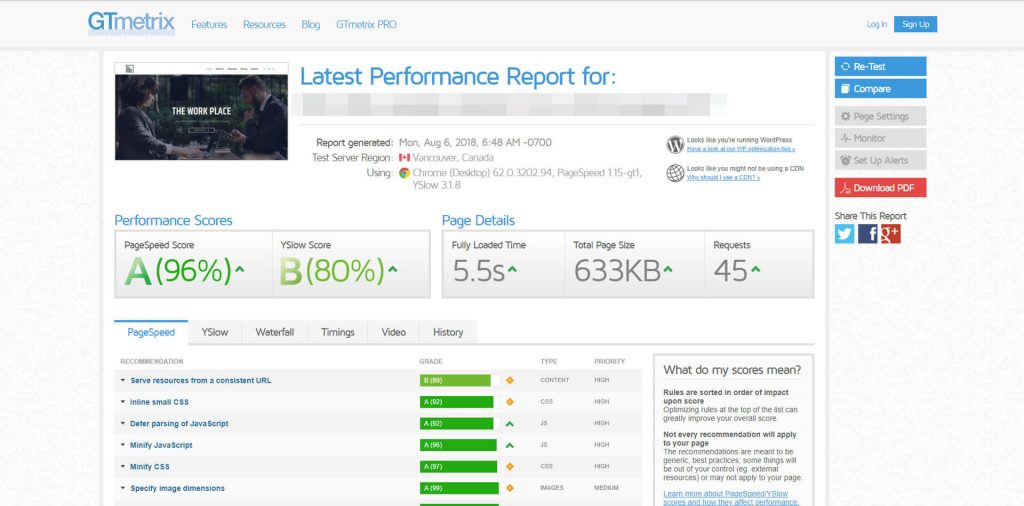
To optimize your website further and improve your overall loading speed, reduce server requests, etc., you can use plugins like Swift Performance, WP Rocket or Autoptimize to a great effect. Time spent getting the best results possible at this stage will pay dividends when it’s being used by your visitors.
25. Check SEO and Overall Grades with Free Online Tools
SEO or Search Engine Optimization is the key to getting our website found. Take the time to check all your pages using tools like Woorank for an immediate check and Google Analytics for ongoing monitoring.
Address any obvious issues and recheck until you achieve the best score you can. Time taken here will give your website the web chances of ranking well and driving traffic.
Just a word of caution: don’t let the report from automated tools confuse you. Sometimes it might not be 100% accurate and relevant for your website. We scan our websites through this tool just to get the idea of things that we can improve.
26. Check Product, Media and Image Licensing
If you’re using third party resources like stock images, ensure you take the time to check the license agreement and how it relates to using on the Internet. You don’t want to fall foul of copyright or licensing issues once the website is launched.
27. Take Backup of Website
Your website is looking great, fast and worded perfectly – Now what?
Well, as we know, technical issues can hamper even the most well-prepared person. So, before you press that LAUNCH button, take a few moments to make a full backup of the website, just in case something unimaginable happens!
Use plugins like UpdraftPlus, WP Time Capsule or BlogVault to set up automated, remote backups of your websites.
28. Domain and Hosting
Choosing a good host is the best decision you will make for a successful website launch. It will ensure your website is fast, safe and secure. You will also need to choose a domain name for your website. Be sure to go with an easy and simple domain name that reflects your brand identity.
- For the domain name: we recommend NameSilo for their competitive price (probably the cheapest on the Internet)
- For the host: You can go with either Cloudways or Inmotion Hosting. You can refer to Web Hosting Reviews for their hosting performance before signing up.
29. Uptime Monitoring
Once your website is live, do not forget to setup an uptime motoring service. Uptime monitors will basically keep a watch on your website and send a notification (email / SMS text) if your website goes down.
We recommend Uptime Robot to monitor your websites. They offer a free plan that works for the most.
30. Bonus Tip:
Okay, we’ve reached the end of the Ultimate Website Launch Checklist and are almost ready to launch the website after taking the time to go through all the points above. But there is still one thing you can do to improve further:
Ask your friends or colleagues to scan through and test your website. They will be happy to help. Usually, as developers, we work on a website for a long time. A fresh mind points out many different things that we often miss. Additionally, if you ask them to record a video while browsing the website, I’m sure you will find many interesting things that you never thought of.
Take Away:
Once done, I am sure you’ll be proud to launch a website that has almost everything to call it complete.
Need a copy of this checklist to manage the website you are working on? You can download that now and share it with your team members.
Download Website Launch Checklist here »
We also have a Website launch Checklist Public board on Trello, that you can copy, customize and use it as per your plan. Not sure how you can copy the board and use it for yourself? You can refer to a quick Gif that will help you copy the Trello board.
I am sure many of you will agree on the checklist I just shared. Do you have a checklist of your own? Please feel free to share it in the comments below.
And yes, keep coming back for more… As we’ll keep updating this post as and when we come across an important factor. 🙂


24 thoughts on “The Ultimate Checklist for a Successful Website Launch!”
Thankyou – a gift that willl keep on giving
Great checklist – thanks for sharing. I had just started a list of tools and now I have a lot more for my list. Thanks. The Trello board is a great idea, I’ll be using that one also. Thanks again.
Post SMTP plugin is great and has nothing but 5 star reviews 🙂
I second Post SMTP, its an awesome plugin.
But also, make sure to add all needed DNS records for sending emails successfully from your web site if you want them to arrive in the INBOX instead of the SPAM/JUNK box.
Excellent! thank you
Wow, very useful, thank you so much!
Fantastic list! Thanks, helps to add in those extra things.
thanks, will be using this as a first port of call pre-launch 🙂
Hi Sujay,
Thanks for the list.
I would like to suggest an improvement that can make it easier for users.
You have described each point in detail in this post, but in Trello board, there is no description. So you can add the description in each card, so that Trello users can just open the card and view the description if they are stuck.
Excellent post though!
For cross browser testing I would also recommend https://www.lambdatest.com/ . The tool sis free for all and helps you perform cross browser testing on all devices and platforms.
very good checklist. I have Make an excel sheet for the same and before launching any sites I am preferred this one.
I have a few suggestions:
1) Apart from Google search consol, we can use bing and Yandex search console.
2) We can use google my business.
3) Adding the websites business page in wiki adds very big backlinks for google engine.
4) Use autoptimize to make lite weight site.
5) Add robots.txt
WOW, this is a great list. All the things swirling in my head you made into a nice easy-to-do list. I am def bookmarking this!
Great list and very thorough!
One of the things that is often forgotten is to try and view your site after the cache is cleared. I have seen it before, that what you are actually working on are cached resources. So your site looks very different to others than it does to you. Robots.txt would also be a great addition 🙂
I also have my very own checklist that I add items to over time (not wordpress specific):
https://peterdaugaardrasmussen.com/2018/08/29/website-checklist/
Hey Peter thank you for sharing your tips and also the article! 🙂
Great list of actionable tips! Things like social images are often overlooked.
Great post! Thank you so much! Very helpful!:)
You’re welcome! 🙂
Glad you liked it.
Very useful information …..thanku so much!
You’re welcome!
This is a great checklist, very useful.
Another tip: to make sure your website works on all mobile devices, you can use a service such as TestingBot or BrowserStack to test on iOS/Android. They have free trial plans.
Awesome! Very Helpful. Thank You a lot!
You’re welcome! 🙂
Thank you. Giving both a pdf and a video are helpful. Does your checklist apply to both WordPress.com and WordPress.org websites?
You’re welcome, Bonnie!
And yes, it would be similar for WordPress.com websites too.